
Drafty doors and windows in Michigan homes, and why they show up every fall
The first cold morning of October tells you a lot about your house. You notice the chill by the front door, the curtain that moves on its own and the bedroom that never quite warms up. Drafty doors and windows are the most common comfort complaint we hear from Southeast Michigan homeowners, and most of them can be fixed with carpentry rather than a replacement quote. Our draft sealing service exists because the fix is usually smaller than people fear.
This guide walks through every place cold air gets past a door or a window, what you can check yourself on a Saturday and what calls for a trained set of hands. It covers entry doors, storm doors, patio doors, double-hung sashes, sills, trim and the caulk lines that hold it all together. When a section points to a job our Wright’s Repairs division handles, we link to it so you can see exactly what the visit includes.
We are a design-build firm based in Ypsilanti, and over the years our crews have worked in older plaster-wall homes in Ann Arbor, postwar ranches in Westland and newer colonials in Canton. The draft problems look different in each, but the causes repeat. Worn seals, doors that moved out of square, sills that rotted from the bottom and caulk that gave up years ago account for nearly everything we find on a winterizing visit for Michigan homes.
How Michigan housing stock shapes the problem
The age of your house predicts where the drafts live. Prewar homes usually have wood windows with weights and pulleys, wood doors with little or no weatherstrip and trim that was never sealed to the framing. Postwar ranches and bungalows often have steel basement windows, aluminum storms and slab doors that have been painted a dozen times. Houses from the 1980s and 1990s tend to have their original vinyl windows and steel entry doors, now old enough that the seals and glazing tape are giving out.
Newer homes are not immune. Builder-grade doors in subdivisions from the 2000s and 2010s often have thin seals and thresholds that were never adjusted after the house settled. We regularly find a gap under a door that is only a few years old simply because nobody turned the threshold screws after the first winter. Knowing the era of your house tells you where to look first and which fixes are likely.
What a draft really is
A draft is air moving through a gap because the pressure on one side is different from the other. In winter, warm air rises and pushes out through upper floors and the attic, and that pulls cold outside air in low, often around doors, basement windows and sill plates. The door you feel it at is not always where the problem starts. That stack effect is why a yearly home check looks at the whole house rather than one opening.
Wind makes it worse. A west wind across an open lot in Saline or a farm field outside Milan loads one side of the house, and every loose seal on that face starts whistling. The same door can feel tight on a calm night and leaky during a February storm. When you test for drafts, test on a windy day, and test more than once, because one calm afternoon can hide a gap that costs you comfort all winter.
Why fall is the right time to fix them
Timing matters in Michigan. Federal climate normals for 1991 to 2020, as compiled by the Old Farmer’s Almanac frost date tool, put the average first fall frost in Ann Arbor around Oct. 4, and exterior sealants and paint want warmer surfaces than a late November afternoon can give. Caulk that goes on a cold, damp sill does not bond well, and it fails early. Fall gives you a window of mild days to do exterior work properly before the snowbird home watch season starts and people head south.
Interior work is less sensitive. Weatherstripping, door adjustments, sash repairs and interior trim can happen any month, which is why our crews stay busy with this work from October through March. If you missed the warm days, you have not missed your chance. You may need to split the job, handling the inside now and saving the exterior caulk line for the first dry stretch in April.
How to find drafts around doors and windows before the first hard freeze
You do not need special tools to find most leaks. All it takes is a calm hand, a little patience and a windy day. Close every exterior door and window, turn on the bathroom and kitchen exhaust fans to pull the house slightly negative, and walk each opening slowly. Air that moves will show itself. This is the same first step a technician takes before a weatherstripping installation, and it tells you where to spend your time.
A few simple tests catch almost everything. Keep notes as you go, room by room, and mark each opening with a strip of painter’s tape where you feel movement. That map becomes the scope of work, whether you do it yourself or hand it to someone else. It also helps you see a pattern, such as every leak sitting on the north face of the house or every problem door being the original one.
- The back of your hand: Slide a damp hand slowly around the door and window frames. Skin feels moving air before your eyes can see anything.
- A stick of incense: Hold a lit stick near the seal line and watch the smoke. If it bends sideways or gets pulled into the gap, you found a leak.
- The dollar bill test: Close a door or sash on a bill. If it slides out with no drag, the seal is not compressing at that spot.
- A flashlight at night: Have someone shine a light around the frame from outside while you watch from inside. Light that comes through means air does too.
- An infrared thermometer: A cheap point-and-shoot reader will show cold streaks along a threshold, a sill or the bottom corner of a sash.
Pay special attention to the places people skip. The hinge side of a door leaks as often as the latch side. The top of a door, where the head jamb meets the frame, is hard to reach and often has no weatherstrip whatsoever. On windows, the meeting rail where the two sashes of a double-hung overlap is a classic leak, and the bottom corners of the sill are where water and cold both find their way in first.
Pro tip from our crews: Test on the windiest day of the week, and test twice, once with the exhaust fans off and once with them running. The fans pull the house slightly negative and exaggerate every leak, so a gap you could barely feel becomes obvious. Mark each leak with painter’s tape so nothing gets lost between the walk-through and the fix.
Reading what the drafts tell you
Where the draft shows up points to the fix. Air coming under a door is a sweep or threshold problem. Air along the latch edge usually means the door is not pulling tight against its stop. A draft at the top corner on the latch side often means the door has sagged on its hinges. A cold stream from behind the interior trim means the gap between the frame and the rough opening was never sealed, which is a job for our trim carpentry crew rather than a new strip of foam.
Some leaks have nothing to do with the door or window itself. Outlets on exterior walls, gaps around a dryer vent, attic hatches and baseboards along outside walls can all feel like a window draft from across the room. If you checked every opening and still feel it, look lower and higher. Sometimes a dryer vent replacement with a working damper or a sealed attic stair installation fixes a draft people blamed on the bedroom window for years.
A quick guide to what each draft usually means
Once your tape marks are up, match each one to the table below. It covers the leaks our technicians find most often in Southeast Michigan houses, the usual cause and who normally handles the fix. Treat it as a starting point, since one opening can have two problems at once, such as a worn sweep on a door that has also sagged.
| Where you feel it | Likely cause | Usual fix | Who handles it |
|---|---|---|---|
| Under the door | Worn or missing sweep, threshold cap set too low | New sweep, raise the threshold cap | Usually a DIY job |
| Along the latch edge | Door not pulling tight against its stop | Strike and latch adjustment | DIY or pro |
| Top corner on the latch side | Door sagging on its hinges | Heavy-duty hinge replacement or a long hinge screw | Pro for heavy or glass doors |
| Behind interior trim | Gap between the frame and rough opening never sealed | Trim removal and resealing | Pro |
| Middle of a double-hung window | Sash lock open or sashes not seated | Lock it, then sash balance replacement if needed | DIY, then pro |
| Edge of a sidelight or transom | Dried or cracked glazing seal | Reseal the glazing | Pro |
| Bottom of a patio slider | Worn rollers or a clogged track | Sliding door roller replacement | Pro |
| Basement window | Old steel hopper with no real seal | Seal, cover the well or replace | Pro |

Fixing a drafty front door with weatherstripping, sweeps and thresholds
The front door takes more abuse than any other opening in the house. It opens dozens of times a day, it faces the weather directly and it carries the weight of a heavy slab on three hinges. Most entry door drafts come down to four parts: the weatherstrip around the frame, the sweep on the bottom of the door, the threshold under it and the way the door sits in the frame. Our door repair services page covers all four, and the rest of this section explains each one.
Start with a look, not a purchase. Open the door and study the seal around it. Is it flattened, torn or missing in spots? Is there paint on it from the last time someone painted the trim? Close the door and look at the bottom from outside. Can you see daylight? Those answers tell you whether you need a replacement strip, an adjustment or a bigger conversation about the slab.
Types of door weatherstripping and where each one works
The U.S. Department of Energy’s consumer guide to air sealing lists tension seals, felt, foam, rubber, door sweeps, metal gaskets, bulb seals and interlocking metal channels as common options. They are not interchangeable. Each one suits a particular gap, a particular amount of friction and a particular door. Picking the wrong type is the most common reason a new seal fails in a single season.
Most steel and fiberglass entry doors sold in the last 30 years use a kerf-in compression seal. The seal has a barbed spine that presses into a slot, or kerf, cut in the door stop. When the seal wears, you pull the old one out and press a new one in. It sounds easy, and it usually is, as long as you match the profile. Seals come in dozens of shapes, and the wrong one either will not compress or will keep the door from latching.
Older wood doors often have no kerf at all. On those, a V-strip, also called a tension seal, fits into the side of the jamb and springs open to fill the gap. Adhesive foam tape works as a stopgap, though it rarely lasts more than a winter on a door that gets heavy use. On historic homes in Ann Arbor’s Old West Side or Ypsilanti’s historic district, spring bronze weatherstrip is the traditional choice and can last decades when it is installed well.
Compression seals versus bulb seals
A compression seal works by being squeezed. It needs the door to close firmly against it, which means the strike plate and the stop have to be right. A bulb seal is a hollow rubber or silicone tube that fills irregular gaps and forgives a door that is slightly out of square. On a door that has moved over the years, a bulb seal can close gaps a flat seal leaves open. Our technicians carry both, along with the tools to cut a new kerf when the old frame never had one.
This comparison covers the weatherstripping types we install most often around Ann Arbor and Ypsilanti. Bring a short piece of your old seal to the store, or send us a photo, because matching the profile matters more than the brand name on the package.
| Type | Best for | Watch out for | DIY friendly |
|---|---|---|---|
| Kerf-in compression seal | Steel and fiberglass doors with a slot in the stop | Dozens of profiles; the wrong one blocks the latch | Yes, with a matching profile |
| V-strip or tension seal | Wood doors and double-hung sash channels | Has to face the right way to spring open | Yes |
| Adhesive foam tape | Stopgap on low-traffic doors | Flattens quickly and peels in the cold | Yes |
| Bulb seal | Doors slightly out of square | Needs a clean, straight mounting surface | Moderate |
| Spring bronze | Historic Ann Arbor homes and other prewar wood doors | Careful fitting and nailing | Pro recommended |
| Brush sweep | Uneven floors and older thresholds | Can catch on rugs | Yes |
Door sweeps and the gap at the bottom of the door
If you see daylight under your door, the sweep is the first suspect. A sweep is a strip of vinyl, rubber or brush fastened to the bottom of the door, or a U-shaped boot that wraps the bottom edge. Boots on steel doors often split at the corners after a few years of foot traffic and grit. Surface-mounted sweeps screw onto the inside face of the door and work well on wood doors that were never built for a boot.
A sweep has to touch the threshold without dragging. Too loose and the draft stays. Too tight and the door binds, the seal tears and someone eventually cuts it off in frustration. Brush sweeps handle uneven floors and older thresholds better than solid vinyl. Where a door swings over a rug or a tile transition, the height has to account for that too, or the sweep will catch on every swing.
How to install a surface-mounted door sweep
A surface-mounted sweep is the easiest draft fix on a wood entry door, and it takes about the tools most homeowners already own: a tape measure, a drill, a hacksaw and a screwdriver. Buy an aluminum or vinyl sweep with slotted screw holes so you can adjust the height after it is on the door.
| Step | What to do |
|---|---|
| Measure | Measure the width of the door at the bottom and cut the sweep to that length with a hacksaw. |
| Position | Close the door and hold the sweep against the inside face so the seal just touches the threshold. |
| Mark and drill | Mark the screw slots and drill small pilot holes so the screws do not split wood or strip a steel skin. |
| Fasten loosely | Drive the screws snug, not tight, then open and close the door a few times. |
| Adjust | Slide the sweep up or down in its slots until it seals without dragging, then tighten the screws. |
| Test | Repeat the dollar bill or flashlight test along the bottom of the door. |
Adjustable thresholds and worn sills
Many modern entry doors sit on an adjustable threshold. Under the center cap, a row of screws raises or lowers the cap to meet the sweep. Turning them a quarter turn at a time is often the cheapest draft fix you will ever make. Our weatherstripping installers check this first because it costs nothing and takes minutes. Many homeowners never know the screws are there, since the cap hides them.
Older homes often have a wood sill, sometimes oak, that has worn a valley in the middle from decades of shoes. A worn wood sill can be rebuilt with an epoxy consolidant and filler if the wood is sound, or replaced if it is soft. Water that sits in that valley rots the sill from the top, and water that gets under it rots the subfloor below. If a sill feels spongy when you press it with a screwdriver, schedule a subfloor repair assessment before the damage spreads.
Some households need the threshold lower rather than tighter. A tall threshold is a trip hazard for anyone using a walker or a wheelchair, and a threshold ramp installation can solve both access and fit. When we rebuild a threshold for an aging parent, we keep the seal in mind so the lower profile does not bring the draft back.
How to adjust an adjustable threshold
If your entry door sits on an aluminum threshold with a wood or vinyl cap, look for screw heads along the top of the cap. They are the height adjusters. You only need a Phillips screwdriver and a dollar bill, and the whole job takes a few minutes per door.
| Step | What to do |
|---|---|
| Find the screws | Locate the adjustment screws along the threshold cap, usually four to six of them spaced evenly. |
| Raise the cap | Turn each screw counterclockwise a quarter turn to raise the cap toward the sweep. |
| Work evenly | Adjust every screw the same amount so the cap stays level from side to side. |
| Test the seal | Close the door on a dollar bill at several points; you should feel drag when you pull it out. |
| Check the swing | Open and close the door. If the sweep scrapes hard or the latch will not catch, back each screw off slightly. |
The strike plate adjustment that costs nothing
A door that closes but rattles in the frame is not pressing its seal hard enough. The fix is often at the strike plate on the jamb, where the latch catches. Moving the plate or bending its tab a few thirty-seconds of an inch pulls the door tighter against the weatherstrip. On doors with a deadbolt, the bolt strike has to move with it. Our lock and deadbolt installation technicians do this adjustment on nearly every visit because a new lock on a loose door still leaves a draft.
Upgrading hardware anyway? Do the seal work during that visit. A smart lock installation depends on a bolt that slides freely into its strike, and a door that has shifted will make the motor strain and the battery drain. Square, sealed doors make every lock work better, smart or not.
Pro tip from our crews: Before you buy a new seal, press on the door from inside while it is latched. If it moves outward, the seal is not being compressed, and the strike plate needs to move in. A lot of calls about a bad seal end with a screwdriver and a few minutes at the strike, not a new part.
Doors that stick, sag or will not latch when the weather turns cold
Michigan doors move with the seasons. Wood takes on moisture in humid summers and gives it back in dry winters, and the frames around them shift as the house settles and the ground freezes. One that latched easily in August can rub at the top corner by January, or the reverse. When a door sticks, people tend to force it, and that tears seals, loosens hinges and makes the draft worse. A professional door adjustment usually fixes the fit without taking the door off its hinges.
Before anyone reaches for a plane, look at the gap around the door. That gap, called the reveal, should be even along the top and both sides, about the thickness of a nickel. If it is wide at the top of the latch side and tight at the top of the hinge side, the door has sagged. Tight everywhere means the door has swollen. The shape of the gap tells you which fix to use.
Sagging hinges and the long screw fix
Sag is the most common cause of a door that rubs at the top latch corner. The top hinge carries most of the weight, and the short screws that came with it only reach the soft jamb, not the framing behind it. Over time they pull out. Replacing one screw in the top hinge with a 3-inch screw that bites into the stud behind the jamb pulls the door back up and toward the hinge side. This small change often closes the gap at the latch corner and stops the draft there too.
Hinge pins wear as well, especially on heavy doors. A worn pin lets the door drop slightly and wobble, which leaves the weatherstrip untouched in some spots and crushed in others. Replacing the hinges with heavier ball-bearing hinges is a common part of our exterior hardware installation work, and it keeps a newly adjusted door from sagging again next year.
How to fix a sagging door with a longer hinge screw
This fix works on most wood and steel doors hung in a wood frame. Grab a drill, a 3-inch screw with the same head size as the hinge screws and a few minutes. For a very heavy or full-glass door, call us instead, since those doors often need new hinges as well.
| Step | What to do |
|---|---|
| Open the door | Swing the door open and look at the top hinge where it attaches to the jamb. |
| Remove one screw | Take out the screw closest to the door stop on the jamb side; it lines up best with the framing behind the jamb. |
| Drive the long screw | Drive the 3-inch screw into the same hole and on into the stud, going slowly so it does not strip. |
| Watch the gap | As the screw tightens, the door pulls toward the hinge side and the top latch corner lifts. |
| Check and repeat | Close the door and look at the reveal. If the gap is still uneven, replace a second screw the same way. |
Swelling doors and the humidity problem
A wood door that sticks everywhere in summer and rattles in winter is breathing with the air. The long-term fix is to seal all six sides of the door, including the top and bottom edges that nobody ever paints. Unpainted edges soak up moisture and swell the fastest. When we trim a door to fit, we seal the cut edge before rehanging it, because bare wood at the bottom edge will swell the next time someone mops the floor or tracks snow inside.
Planing a door in winter, when it is at its smallest, can leave it too loose in summer. Planing it in August can leave a gap you can see through in February. Our crews measure and plan for the seasonal range rather than for the day they are standing there. After a trimmed door needs refinishing, our trim and door painting team seals the new edges and matches the finish.
Pro tip from our crews: If a door has to be planed, do it in late spring or mid-fall, when indoor humidity sits near the middle of its yearly range, and seal the cut edge the same day. A door planed in August can rattle by February, and an unsealed bottom edge soaks up water from mopping and melting snow.
When the latch will not catch
A latch that misses its strike usually means the door or the frame moved. Sometimes the whole jamb has shifted because the house settled or the shims behind it compressed. Sometimes the strike just needs to move a sixteenth of an inch. An unlatched door will never seal, no matter how good the weatherstripping is, because nothing is holding it against the seal. Get the latch right first, then fix the seal.
Interior doors behave the same way, and a sticking bedroom or bathroom door is often a sign the whole house is moving. If several interior doors started rubbing at once, it may be worth a look at the floor framing under them. A new interior door installation fixes a door that is warped past saving, and our pocket and bifold door repair service handles the sliding and folding doors that jump their tracks when the frame shifts.

Double doors, sidelights and transoms: the entry door gaps nobody checks
A grand entry with double doors or glass sidelights looks welcoming from the street, and it has more places for air to sneak in than a single slab. Every joint between a door, a sidelight panel, a transom and the frame is a seam, and every seam needs a seal. When homeowners in Northville or Plymouth ask us why a newer entry still feels cold, the answer is usually in one of these seams rather than the door itself. We sort that out during a front door repair visit before anyone talks about replacement.
The homes we work on in Northville and the older neighborhoods of Plymouth often have wood entry systems built in the 1990s or earlier. Those units were well made, but their seals and glazing compounds were not built to last three decades. The good news is that the parts that wear out are usually the cheapest parts of the system.
The astragal and flush bolts on a pair of doors
On a pair of doors, one door is active and the other, called the inactive leaf, stays locked in place with flush bolts at the top and bottom. The strip where the two doors meet is the astragal, and it carries its own weatherstrip. If the flush bolts do not fully engage, the inactive door can drift a quarter inch in the wind, and the seal between the two doors opens up. Tightening the bolts, cleaning out the holes they drop into and replacing the astragal seal can make a pair of doors feel solid again.
The bottom corner where the astragal meets the threshold is a favorite spot for cold air. A small foam or rubber pad, called a corner seal pad, closes that joint. Many doors leave the factory with one and lose it within a few years. The part is tiny, but missing it can let a steady stream of air in at floor level. Checking for it takes seconds with a flashlight.
Sidelights, transoms and failing glazing
Sidelights and transoms are fixed glass panels, and they are sealed with glazing tape, silicone or putty, depending on age. When that seal dries and cracks, air and water move around the glass. You might see a line of condensation or feel a draft along the edge of the glass rather than at the door. Resealing the glazing is careful work, especially with decorative leaded or beveled glass. Our window and opening repair technicians can tell you whether the seal can be renewed in place or whether the glass panel itself needs a specialist glass shop.
The mull, or vertical post between a door and its sidelight, is another weak point. If the mull was never sealed to the rough opening, air can move up through the wall cavity and exit at the trim. Pulling the interior casing, filling the gap with low-expansion foam and reinstalling the trim is the standard fix. It is the kind of job where the carpenter who handles your trim should be the same person sealing behind it, so nothing gets cracked or mismatched.

Storm doors in Southeast Michigan: when they help and when they hurt
A storm door adds a second layer outside the entry door, and in the right spot it cuts drafts, protects the door from snow and ice and lets you open the house to a breeze in spring. Pella notes that a storm door can help protect the primary door from rain, ice and snow. Our storm door installation service handles both new doors and the repair of old ones that stopped closing right.
Storm doors are not the right answer everywhere, though. Pella’s own guidance warns that glass storm doors trap heat, and that a porch getting more than a few hours of direct sun is better off without one. On a south- or west-facing entry, the space between the two doors can get hot enough to warp a wood door, peel its finish or damage the seals you just paid for. Some entry door makers say heat damage from a storm door can affect their warranty, so check your paperwork first.
Choosing a storm door for a Michigan entry
If your entry is shaded or faces north or east, a full-view storm door with interchangeable glass and screen panels works well through all four seasons. On a sunny exposure, a model with a retractable screen and less glass, or a vented top panel, keeps the heat buildup down. Either way, the storm door needs its own sweep and a closer adjusted so it latches every time. A storm door that blows open in a January wind helps nobody and often tears the hinge rail out of the frame.
Storm doors also change how your main door behaves. A tight storm door can create a pressure pocket that makes the entry door harder to close. If that happens, the storm door’s vent or its sweep may need a small adjustment. When we install one, we check both doors together, because a storm door that makes your main door harder to latch leaves you with the same draft you were trying to fix.
Use the table below as a rough guide before you buy. It matches common entry exposures in our area to the storm door styles that tend to work, and it is the same conversation our technicians have on site during a storm door fitting and closer adjustment visit.
| Entry faces | Sun on the door | Storm door fit |
|---|---|---|
| North | Little direct sun | Full-view glass works well year-round |
| East | Morning sun | Full-view glass is usually fine; confirm your entry door warranty |
| South | Long midday sun | Retractable screen or vented model, or skip the storm door |
| West | Hot afternoon sun | Highest heat risk; retractable screen style or no storm door |
| Deep covered porch, any side | Mostly shaded | Most styles work |
Fixing an old storm door instead of replacing it
Many storm doors fail in small, fixable ways. The pneumatic closer wears out and the door slams or drifts open. The latch breaks, the expander at the bottom slips and daylight shows underneath, or the screen tears. Each of those is a part, not a door. Replacing the closer, the sweep and the latch often gives an old storm door another 10 years. Our exterior repair crew can tell you on site whether the frame is still worth saving.
Sliding patio doors and French doors in a Michigan winter
Patio doors are big, heavy and full of glass, and they tend to face the backyard, where the wind has a clear run at the house. A sliding door that drafts usually has one of three problems: worn rollers that let the panel drop out of its seal, worn pile weatherstrip along the edges, or a track so full of grit that the door never fully closes. Our patio door repair technicians see all three every week from October on.
Sliders that open onto a deck see extra trouble. Snow piles against the glass, melts and refreezes in the track. If the track’s weep holes are clogged, water sits there and freezes the door shut. Clearing those holes each fall and keeping the deck side clear of drifts makes a real difference. It pairs well with a look at the deck repair needs outside the door, since boards that slope toward the house send water right into that track.
Rollers, tracks and the interlock seal
Most sliding doors have adjustment screws at the bottom of each end of the moving panel. Turning them raises or lowers the rollers. When the rollers wear flat, the panel sinks, the top pulls out of its channel and the interlock, where the two panels overlap in the middle, stops sealing. New rollers and a height adjustment usually fix the draft and make the door glide again. Worn pile weatherstrip, the fuzzy strip along the edges, slides out of its channel and a new one slides in.
If a slider has a cracked panel or fogged glass, that is a glass job for a specialist shop rather than a full replacement, and we can point you to one. If the frame itself has racked or the sill has rotted under it, replacement may be the better use of your money. We will tell you which one you are looking at. When replacement is the right call, the exterior door replacement work sits with our design-build team, and we keep the two separate so the repair answer stays honest.
How to clean a sliding door track and adjust the rollers
A slider that sticks and drafts often just needs a clean track and a roller adjustment. Gather a vacuum with a crevice tool, a stiff brush, a Phillips screwdriver and a can of dry silicone spray. Skip grease and oil, which hold grit and make the problem worse by spring.
| Step | What to do |
|---|---|
| Vacuum | Vacuum the bottom track end to end with a crevice tool. |
| Scrub | Scrub the track with a stiff brush and warm, soapy water, then dry it. |
| Clear the weep holes | Push a pipe cleaner or stiff wire through the weep holes on the outside of the track. |
| Find the adjusters | Pop the small caps off the bottom of each end of the moving panel to reach the roller screws. |
| Adjust | Turn the screws to raise the panel until the gap at the top is even and the door glides. |
| Lubricate | Mist the track with dry silicone spray and slide the door several times. |
Why French doors draft and how to tighten them
Exterior French doors combine the weak points of a pair of entry doors and a wall of glass. They have an astragal, flush bolts, two sets of hinges and two sweeps, and each glass panel is its own glazing seal. Most French door drafts come from the meeting point in the middle or from a sagging active door. The fixes match the ones for double entry doors, with extra care on the hinges, because glass doors are heavy and sag faster than solid ones.
Interior French doors between rooms do not need weatherstripping, but they do need to latch. If an interior French door in a home office or den will not stay closed, it is usually a strike or hinge problem, and it is a quick fix. Many people who set up a home office setup in a spare room ask us to fix those doors at the same visit, since a door that stays closed also keeps sound in.

Drafts at the door between the garage and the house
The door from an attached garage into the house gets forgotten because it does not face the weather. It still separates your living space from an unheated room that can drop well below freezing in January. It also keeps car exhaust, gas cans and lawn equipment fumes out of the house. A gap under that door is a comfort problem and an air quality problem. Our air sealing technicians treat that door as an exterior door, because in winter it acts like one.
The International Residential Code, which Michigan’s residential code is built on, sets a minimum for this door: solid wood or solid or honeycomb-core steel at least 1 3/8 inches thick, or a door rated for 20 minutes of fire resistance. Where it is a hollow-core interior slab, which we still find in older homes, replacing it fixes the draft and brings it up to code. Local rules vary, so we confirm with the building department where it matters.
Weatherstripping and sweeps on the garage entry door
Once the right door is in place, it gets the same treatment as a front door: a full weatherstrip, a sweep or door bottom and a latch that pulls it tight. Many garage entries step down from the house to the garage floor, and the sweep has to clear that step without leaving a gap. A threshold that meets the sweep closes the last opening. If the door also needs a new lock or a lever handle conversion for easier use with full arms of groceries, we handle it on the same trip.
A mudroom between the garage and the kitchen adds a second barrier and gives boots a place to drip. If your entry has no buffer at all, a mudroom entryway can be a design-build project worth planning over the winter for a spring build. Our blog also covers mudroom and laundry entryway ideas for Michigan if you want to see what that looks like.

Drafty windows: sashes, locks and the seals between them
Window drafts feel different from door drafts. Instead of a stream at your ankles, you feel a cold wash across the room, the curtains move and the glass fogs at the edges. The frame and sash are the usual suspects, not the glass. Before anyone quotes you new windows, it is worth knowing that most drafty windows can be tightened in place. That is the whole point of our window repair service, which keeps replacement as the last answer rather than the first.
Start by identifying the window type. Double-hung windows, where both sashes slide up and down, are the most common style in Southeast Michigan homes built from the 1920s through today. Casement windows crank outward on a hinge. Sliders move side to side. Each one seals differently, fails differently and gets fixed differently, so knowing which one you have makes the rest of this section much more useful.
Double-hung windows and the meeting rail
On a double-hung window, the two sashes overlap in the middle at the meeting rail. The sash lock, a small latch on top of the lower sash, does more than keep burglars out. When you turn it, it pulls the two sashes together and presses them against their seals. A window that is closed but unlocked often leaks noticeably more air than one that is locked. Try it on your coldest window tonight. If turning the lock stops the draft, you just found a free fix.
If the lock will not close, or closes without pulling the sashes together, the sashes may not be fully seated. Broken balances are the most common reason. Balances are the springs or weights that hold the sash up, and when they fail, the lower sash drops a quarter inch or will not stay open. New balances let the sash seat properly again. Our window trim repair visits often include balance replacement, since the stops that hold the sash have to come off anyway.
Pro tip from our crews: On the first cold night of the season, walk the house and lock every sash lock, even on windows you never open. Locked sashes press against their seals and stop a surprising number of drafts. If a lock will not turn, do not force it, because that usually means the sash has dropped and needs new balances.
Old wood windows with weights and pulleys
Many prewar homes in Dearborn neighborhoods and older parts of Royal Oak still have original wood windows with sash cords, pulleys and iron weights hidden in the wall. When the cords break, the sash falls, and the empty weight pocket becomes a cold channel straight into the house. Restoring those windows means new cords, new weatherstrip in the sash channels and sealing the weight pocket access panel. Done well, a restored wood window can outlast a vinyl replacement.
These windows are worth saving in historic districts, where replacing them may require approval anyway. Ann Arbor, Ypsilanti and several other towns in our service area have local historic districts with their own rules on exterior changes. If you live in one, check with your historic district commission before changing windows or doors. Our design-build crews have worked on older homes in Royal Oak, and our Washtenaw County crews are used to working within those limits.
Casement and awning windows that will not close tight
Casement windows seal well when everything works, because the wind pushes the sash against its gasket. When the crank operator strips or the hinges wear, the sash cannot pull closed, and the gap on the latch side lets air pour in. Replacing the operator and the locking hardware is a common repair, and the parts are available for most major brands. The sash gasket itself can dry out and flatten over 20 years and is often replaceable too.
Awning windows, which hinge at the top and open outward from the bottom, fail in a similar pattern. They show up often in basements and bathrooms. If a bathroom awning window sits right above a tub and weeps condensation every morning, the problem may be ventilation more than the window. Pairing the window repair with a properly sized bathroom exhaust fan keeps that moisture off the frame so it does not rot.
Sliding windows and worn pile weatherstrip
Horizontal sliding windows use the same fuzzy pile weatherstrip as patio doors, and it wears the same way. Once the pile flattens, the sash rattles and air slips past the edges. New pile slides into the sash channel. The bottom track also needs clear weep holes, or melted snow collects and freezes. When a slider is hard to move, clean the track and check the rollers before assuming the window is done.

Window trim, sills and wood rot in older Michigan houses
Look at a window from outside and you see the sill, the brickmould or casing around it and the caulk line where it meets the siding. Those are the parts that fail first, and they are all carpentry. Water runs down the glass, collects on the sill and finds any crack in the paint. Michigan freeze-thaw cycles widen that crack every winter, and a sill that looked fine three years ago can be soft enough to push a finger into. Our exterior carpentry repairs handle this before it reaches the framing.
The bottom corners of the sill are almost always the first to go, because water sits there longest. A soft corner can often be cut out and replaced with a new piece of rot-resistant wood or cellular PVC, glued and pinned in place, then primed and painted. Replacing the whole sill is bigger work but still far cheaper than a new window. On a house with many windows, catching the soft spots early keeps a small carpentry bill from turning into a window order.
Interior stools, aprons and casing
Inside, the window has a stool, the ledge people set plants on, an apron below it and casing around the sides and top. When those pieces pull away from the wall or show gaps, air from the wall cavity can come through. Removing the trim and sealing the gap between the window frame and the rough opening is the real fix. Our interior trim carpenters reinstall or replace the pieces afterward so the window looks the way it did, or better.
Older homes sometimes have trim profiles no store carries anymore. We match those by milling new pieces or adapting stock profiles. If your home has custom millwork and trim worth preserving, the goal is a repair you cannot see. Crown and casing in plaster-wall houses also get a touch-up painting pass so the new caulk and filler disappear.
Pro tip from our crews: Before pulling any interior trim, snap a few photos and number the back of each piece in pencil. Old casing rarely goes back in the same way twice, and a photo saves an hour of guesswork. Use a stiff putty knife behind the trim, never a pry bar straight against plaster.
Lead paint on windows in older homes
Windows are one of the most common places to find lead paint in older houses, because sashes rub against their frames every time they open and create dust. Federal rules under the U.S. Environmental Protection Agency’s Renovation, Repair and Painting program apply to paid work that disturbs painted surfaces in homes built before 1978, and window replacement is covered regardless of size. For a house that old, ask any contractor how they will handle painted surfaces before work begins.
That rule is not a reason to avoid fixing windows. Instead, it is a reason to fix them carefully, with containment, cleanup and the right methods. Planning to scrape and repaint window trim yourself? Read the EPA’s guidance on lead-safe work practices first. Our home inspection repairs team often sees this come up after an inspection flags peeling paint around windows.
Caulking windows and doors the right way
Caulk is the cheapest material in a draft-sealing job and the one most often applied wrong. It belongs in joints that do not move much, such as where a window’s exterior casing meets siding or where interior trim meets drywall. It does not belong in the gap between a sash and its frame, where the window needs to move. Caulking a window shut stops the draft and also stops the window from opening, which is a problem if it is a bedroom’s only way out in a fire.
Old caulk has to come out before new caulk goes in. Laying a fresh bead over cracked, dirty caulk seals nothing, because the new bead sticks to the old one and not to the wood. Cut it out, clean the joint, fill deep gaps with foam backer rod and then caulk. The whole process is slower than it looks, which is why a clean exterior caulk line is one of the first things our fall winterizing package checks.
Picking caulk for Michigan weather
Exterior joints need a caulk that stays flexible through temperature swings from summer heat to subzero nights. Polyurethane and high-grade hybrid sealants handle that movement well and bond to wood, masonry and vinyl. Acrylic latex is easy to use and paintable but does better indoors or in protected joints. Silicone resists water and lasts a long time but will not take paint. The Energy Department’s guidance also calls for heat-resistant silicone around flues and vents, and for hiring a pro for those spots.
Temperature matters too. Most sealant makers list a minimum application temperature on the tube, and many put it near 40 degrees Fahrenheit, with a dry surface. In Michigan, that makes late September through mid-October the practical window for exterior caulking. After that, you are gambling on a warm afternoon. If the season gets away from you, a temporary interior seal can carry you to spring, and we can come back for the exterior.
Six sealants cover nearly every job we see during exterior caulk and trim work, and the chart sorts them by where each one belongs. Read the tube for its minimum application temperature, because the number varies by product, and buy a color that matches your trim if you do not plan to paint over it.
| Sealant | Best use | Paintable | Notes |
|---|---|---|---|
| Polyurethane | Exterior trim to siding and masonry | Yes, once cured | Tough and flexible; messy to tool, cleans up with solvent |
| Hybrid polymer | Exterior joints on wood, vinyl and masonry | Most are | Handles freeze-thaw movement well |
| Acrylic latex | Interior trim and protected joints | Yes | Easy water cleanup; less flexible outdoors |
| Siliconized acrylic | Interior and mild exterior joints | Yes | A middle ground between latex and silicone |
| 100% silicone | Glass, tubs and wet areas | No | Long lasting; paint will not stick to it |
| High-temperature silicone | Around flues, chimneys and vents | No | A job for a pro, per the Energy Department |
How to recaulk exterior window trim
This is the most useful exterior job you can do on a dry fall weekend. Have a utility knife, a stiff putty knife, a caulk gun, foam backer rod for wide gaps, painter’s tape and a tube of exterior-grade sealant rated for your siding.
| Step | What to do |
|---|---|
| Pick the day | Choose a dry day above the sealant’s minimum temperature, with no rain forecast until it cures. |
| Remove the old bead | Cut out the old caulk along both edges with a utility knife and scrape the joint clean. |
| Clean and dry | Brush out dust, wipe the joint and let any damp wood dry completely. |
| Back wide gaps | Press foam backer rod into any gap wider than about 1/4 inch so the new bead stays thin. |
| Lay the bead | Run one steady bead, then smooth it with a tool or damp finger and pull any tape right away. |
| Leave the weeps | Never seal the bottom edge of a storm window or cover weep holes, so water can still drain. |
Interior caulk and trim gaps
Inside, caulk fills the joint where trim meets the wall and where the stool meets the sash frame. Those gaps open when the house dries out in winter, and they let wall-cavity air into the room. A paintable latex caulk handles this job well. Do not confuse it with the sealant around tubs and showers, which is a different product and a different job. Our bathroom caulking service uses mold-resistant silicone for wet areas.
One more interior gap is worth checking: the joint where the baseboard meets the floor along exterior walls. Air from the basement or the rim joist often comes up there and gets blamed on the window above. A bead of clear caulk or a new shoe molding can close it. If the floor has dropped away from the wall, a squeaky floor repair visit can also check the joists and subfloor while we are there.

Window condensation, fogged glass and what a weeping window tells you
Water on the inside of a window in January worries people, and it should get your attention. That water does not always mean the window is failing. Condensation forms when warm, moist indoor air touches a surface colder than its dew point. Glass is the coldest surface in most rooms, so it shows moisture first. The question is where the water forms: on the room side of the glass, between the panes or on the frame and sill.
Moisture on the room side of the glass usually points to high indoor humidity more than a bad window. Cooking, showers, drying clothes indoors and a crowd at the holiday table all add water to the air. Better ventilation often solves it. A kitchen range hood that vents outside and a bath fan that runs long enough after a shower can bring the glass back to clear.
Where the water forms tells you what to do about it. Use this table on the next cold morning, when condensation is at its worst, and walk every window. If the pattern points at the sill or frame, a sill and stool repair visit can deal with any wood that has already started to soften.
| Where the water shows | What it usually means | What to do |
|---|---|---|
| Room side of the glass | Indoor humidity is high for the outdoor temperature | Run fans longer, lower the humidifier, open blinds a few inches |
| Between the panes | The insulated glass seal has failed | Have a glass shop replace the unit |
| Outside of the glass on cool mornings | Normal for efficient glass | Nothing; it burns off with the sun |
| On the frame and sill | Humid air meeting a cold frame, sometimes an air leak | Wipe daily, ventilate, check the seals, repair soft wood |
| Frost or ice on the inside frame | A real air leak or very high humidity | Seal the leak and bring humidity down |
Fogging between the panes
Fog or mineral streaks between the two panes of a double-pane unit mean the seal around the insulated glass has failed. No amount of wiping fixes it, because the moisture is inside. On most windows, the insulated glass unit can be replaced by a glass shop without replacing the sash or frame, at a fraction of the cost of new windows. Glass-only work sits outside our repair scope, so we refer it to a glass specialist, and we can fix the sash, stops and trim around it.
A failed seal also means the gas fill, if the unit had one, has escaped, so the glass no longer insulates as well as it did. That makes the inner pane colder and more likely to collect condensation on the room side too. If several units in the same house have fogged at once, it may be age, and it may be time to price replacement. Our technician will say which way the numbers point. The window replacement side of our business handles the full-unit answer when that is the right call.
Water on the frame and sill
Condensation that runs down the glass and pools on the sill is where real damage starts. Wood sills and stools soak it up, paint peels and mold can start in the corners. Wiping sills daily in the worst weeks helps, and so does opening blinds and curtains so warm air can reach the glass. If the sill has already darkened or softened, it needs repair before spring. Our water damage prevention visit looks for exactly these early signs.
Tightening a house changes its humidity. When you seal drafts, less dry outdoor air comes in, and indoor humidity rises. That is usually good for comfort and for wood floors and trim. If windows start weeping after a sealing job, you may need to run bath and kitchen fans more, or add mechanical ventilation. That is one reason we look at the whole house rather than sealing one window at a time.

Basement windows and window wells: the lowest drafts in the house
Basement windows sit at the bottom of the stack effect, where cold air gets pulled in hardest. Many are single-pane steel or aluminum hopper windows from the 1950s and 1960s with no real seal at all. If your basement feels colder than it should, check those windows first. Some can be sealed and weatherstripped. Others are too far gone and belong in a replacement conversation, especially if a finished basement needs a proper egress window.
Window wells cause their own problems. A well with no cover fills with leaves and snow, and water that sits against the window freezes and thaws against the frame. A well that drains poorly can push water through the window and into the basement in spring. A clear window well cover installation keeps snow and debris out while still letting light in, and it cuts the cold air that pools against the glass.
Egress windows and bedroom safety
If a basement room is used for sleeping, code requires an emergency escape and rescue opening, usually an egress window with a well and a way to climb out. Sealing a drafty basement window must never make it harder to open in an emergency. If you are finishing a basement or adding a bedroom down there, read our guide to egress window codes and costs in Michigan, and see how our basement egress window installation team handles the dig, the well and the permit.
Basements bring other winter questions too, from moisture to heat. Our guide to basement work in a Michigan winter explains why winter is a good season to finish a basement and what to watch for along the way. For drafts, the rim joist and sill plate above the foundation are usually bigger leaks than the windows, and they deserve a look on that trip too.
Storm windows, screens and the second layer outside
Exterior storm windows were standard on Michigan houses for decades, and many older homes still have them. A storm window in good shape adds a dead air space outside the main window, cuts drafts and protects old wood sashes from the weather. Triple-track aluminum storms, with a glass panel and a screen that slide in their own tracks, are the most common type. They are worth keeping if they still move and seal.
Storm windows need weep holes at the bottom so water can drain. If someone caulked the bottom edge shut, water gets trapped between the storm and the main window and rots the sill. We see that mistake often. Clearing or drilling weep holes and resealing only the sides and top is a small fix that protects the main window for many winters.
Screens in winter
Window screens do not stop drafts, but they do suffer in winter. Snow and ice load them, and wind bends frames that are left up all season. On casement windows, the screen sits inside and can stay. On double-hung windows with half screens, taking them down in the fall and storing them flat keeps them straight. Label them by window as you go. It saves a frustrating afternoon in April.
Torn or bent screens are a spring job for most people. Got a stack of damaged ones already? Fall is a good time to have them rescreened so they are ready when the weather turns. Our spring home maintenance visits pick up screens, exterior caulk touch-ups and any trim the winter damaged.
Repair or replace: when a drafty door or window is past fixing
Most drafty doors and windows can be fixed. Some cannot, and it helps to know the signs so you do not pour repair money into a unit that is at the end of its life. We would rather tell you a window needs replacing than sell you three rounds of repairs. Our entry door repair technicians and window techs work from the same rule: fix what is worth fixing, and say so plainly when it is not.
A door is usually past saving when the slab is split or delaminating, the frame has rotted at the bottom of the jambs, or the door has warped so badly that no adjustment will make it seal. A steel door with rust bubbling through the skin at the bottom is often at the same point. A window is usually past saving when the frame has racked out of square, the sash joints have come apart or the rot has moved from the sill into the frame itself.
Our technicians sort repair from replacement using the signs laid out here. Most openings land in the left column, and the fix is a part, an adjustment or a patch rather than a new unit. When a row lands in the right-hand column, our design-build team can walk you through entry door replacement options or new windows.
| What you see | Usually a repair | Usually a replacement |
|---|---|---|
| Worn seals, sweeps or thresholds | Yes, new parts | |
| Door sagging or rubbing | Hinges, long screws, adjustment | |
| Split or delaminating door slab | New slab or new unit | |
| Rot at the bottom of the jambs | Patch if the rot is small | New frame if it runs up the jamb |
| Double-hung sash will not stay up | New balances | |
| Fogged glass in one or two windows | Glass shop replaces the units | |
| Frame racked out of square | New window or door unit | |
| A whole wall of single-pane windows | Storm windows as a stopgap | New windows |
The cost of doing nothing
We will not put a percentage on your heating bill, because too much depends on your furnace, your thermostat habits and the winter itself. Anyone promising a guaranteed saving from weatherstripping is guessing. What is certain is that drafts cost comfort, and small water leaks around doors and windows become big repairs if they sit. A soft sill corner in October is a carpentry job. The same sill in April may mean new framing below the window.
For those cases, our design-build team handles the replacement, and the options are wide. Our Michigan window replacement guide covers frame materials, glass packages and what to expect. Pairing new windows with siding work on the same wall can make sense too, since both involve the same weather barrier. Our blog on siding options for Michigan homes lays out the choices.
Safety checks before you seal up the house
Sealing drafts is some of the least risky energy work a homeowner can do, but there is one real caution. A house that gets much tighter changes how its fuel-burning appliances breathe. An older, atmospherically vented water heater or furnace relies on the house to supply air for combustion and to help pull exhaust up the flue. In a very tight house, exhaust can spill back into the living space, which the Energy Department’s guide flags as a carbon monoxide risk.
If we see that setup while sealing, we put it in writing and recommend having the appliance checked by the mechanical trade that services it. We do not work on furnaces or water heater venting ourselves. What we do is make sure you know, and make sure your detectors work. That caution is also why a home fire safety package pairs well with any sealing job.
Smoke and carbon monoxide detectors
Every home with a fuel-burning appliance or an attached garage should have working carbon monoxide alarms. Smoke alarms belong in every bedroom, outside each sleeping area and on every level. Both types wear out, and most carry a replace-by date on the back. If yours are older than that date, or you cannot find one, replace them before winter. Our smoke and carbon monoxide detector installation service handles hardwired and battery units.
The dryer vent is the other fall safety check that ties into drafts. A crushed or lint-packed vent is a fire risk, and a vent flap stuck open lets cold air into the laundry room all winter. A dryer vent cleaning clears the line and checks that the outside hood closes. It takes about as long as a door adjustment and often gets booked alongside it.
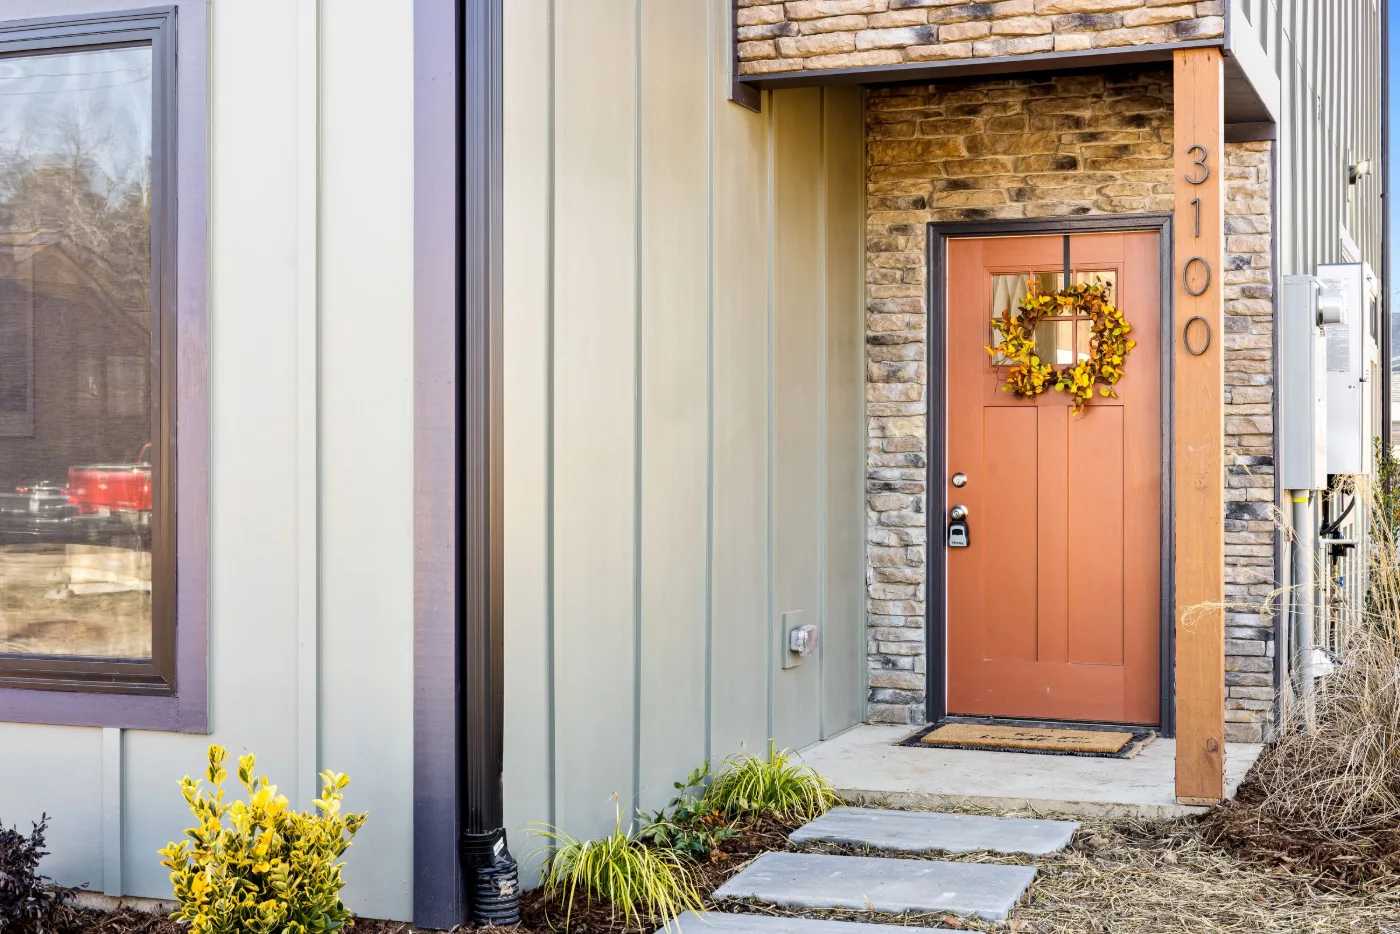
A fall timeline for sealing drafty doors and windows in Southeast Michigan
Sealing a house works best as a season-long plan instead of a single scramble on the first cold weekend. Michigan gives you a predictable order of operations. Exterior work goes first, while surfaces are warm and dry. Interior work fills the colder months. Anything you cannot finish carries into spring. Booking a whole-house draft sealing visit early in the fall gives you the most choices and the best weather for the outside work.
Here is the season at a glance. Pin it to the fridge or keep it on your phone, and book the exterior jobs first. The spring row feeds straight into our spring exterior touch-ups, so nothing the winter damages sits for long.
| When | Outside the house | Inside the house |
|---|---|---|
| September to mid-October | Exterior caulk, sill and rot repair, paint, storm door closers, drain hose bibbs | Walk every opening and mark the leaks |
| Late October to November | Window well covers, clear patio door tracks | Weatherstripping, sweeps, thresholds, sash balances, trim sealing |
| December to February | Clear ice and salt from thresholds and sills | Hinge and threshold touch-ups, midwinter draft check, condensation watch |
| March and April | Inspect caulk and sills, rescreen windows | Plan any replacements for the summer |
Late September and early October
This is the best time for exterior caulk, sill repairs, rot patches and paint on doors and trim. Days are still mild, surfaces dry out by midmorning and sealants cure properly. September is also the time to fix a storm door closer, clear patio door tracks and check that window wells drain. If you have a soft sill or a rotted door jamb, get it on the calendar now, because exterior carpentry gets harder to schedule once the cold settles in.
Early fall is also when outdoor hose connections should be shut off and drained. A frozen hose bibb can split inside the wall and flood a basement the first warm day in March. A frost-free hose bibb replacement is one of the cheapest insurance policies you can buy, and it is easy to add to a fall visit. Knowing where your main and fixture shutoff valves are, and that they turn, matters just as much.
Late October through November
As the nights drop below freezing, the work moves indoors. Weatherstripping, sweeps, threshold adjustments, sash balances, lock work and interior trim sealing all happen comfortably now. This is when drafts are easiest to find, too, because the temperature difference between inside and outside is large enough to feel. November is a good month to book work before holiday guests arrive and every bedroom gets used.
November is also when people start noticing the rooms that never warm up. If a bonus room over a garage or a sunroom off the kitchen is always cold, the doors and windows are part of the answer, and so are the walls and floor. We can tell you which part is a repair and which part is a design question. For a four-season room that was built as a three-season room, our guide to three-season versus four-season sunrooms explains the difference.
December through March
Midwinter is the season for interior repairs and planning. A door that sticks once the furnace kicks on, a window that fogs every morning or a draft that only shows up in a west wind all tell you something. Write them down. When spring comes, you will have a clear list for exterior work, and anything that needs replacement can be planned instead of rushed. A home watch service for snowbirds can keep an eye on an empty house through the coldest months.
Winter storms bring their own emergencies. A tree limb through a window or a door kicked in by wind needs to be closed up quickly. Our storm damage board-up service secures the opening and photographs it for your insurer before any permanent repair. For bigger damage, our storm and disaster repair team takes it from there.
Keeping sealed doors and windows working all winter long
A new seal is only as good as the care it gets through its first winter. Road salt, grit and ice are hard on weatherstripping, sweeps and thresholds, and a Michigan entry sees all three from December to March. Sweep the threshold clear of salt and sand after storms, and knock ice off the sill before you close the door on it. A door closed hard over a ridge of ice crushes the sweep, bends the threshold cap and leaves a gap that lets the cold back in.
Rubber and vinyl seals last longer with a light wipe of silicone spray or a rubber conditioner in the fall. It keeps them soft in the cold and stops them from sticking to painted frames and tearing when the door opens. Keep paint off the seals when you refresh the trim. A seal glued to the jamb by a coat of latex will rip the first time the door swings in freezing weather, and that is one of the most common failures we replace.
A quick midwinter check on your doors and windows
Pick a windy January afternoon and repeat the draft tests you ran in October. Walk each door and window with your hand or an incense stick and see whether anything changed. Doors that were adjusted in October may have shifted as the house dried out, and a quarter turn on a hinge screw or a threshold screw often brings them back. Note anything bigger for spring, when exterior work is possible again.
Check the sash locks while you are at it, because they loosen over the season and kids like to leave them open. Look at the bottom corners of each sill for peeling paint or dark wood, and wipe away condensation that collects on cold mornings. If you see water getting in anywhere, call before it spreads. Our water leak response team can find the source and stop it, and the fix is almost always smaller in January than it would be in May.
Keep this short checklist handy for that January walk. The whole round fits inside a cup of coffee and catches most problems while they are still small. Snap a photo of anything that looks different from the fall, so you can compare it in spring and show a technician exactly what changed.
- Repeat the hand or incense test on every exterior door and window.
- Turn every sash lock and note any that will not close.
- Look for peeling paint or dark wood at the bottom corners of each sill.
- Check that storm doors latch and their closers still pull them shut.
- Clear salt, sand and ice from thresholds and door tracks.
Finally, keep the areas outside your doors in good shape. Loose or rotted porch and deck steps are a winter slip hazard, and snow shoveled against the bottom of a door melts into the threshold on the first sunny day. Our deck stair repair and stair railing installation services make the path to the door safer, which matters as much as a tight seal when the steps are icy.

Which draft repairs you can do yourself and which need a pro
Plenty of draft work is fair game for a handy homeowner. Replacing a worn door sweep, adjusting a threshold, turning sash locks, installing adhesive foam on a stop and swapping a kerf-in seal of the right profile are all weekend jobs. So is a careful interior caulk line. A good hardware store can sell you the parts, and online videos cover the basics. If it goes well, you may never need to call anyone, and that is fine with us.
Other jobs are easier to get wrong. Rehanging a sagging door, planing and resealing a slab, replacing sash balances, rebuilding a rotted sill and sealing behind trim all take tools, experience and a feel for how the parts fit together. Work on pre-1978 painted surfaces brings lead-safe rules into play. That is where our small repair and home maintenance team earns its keep, because the fix has to last longer than one winter.
Good weekend jobs for a handy homeowner
Handy homeowners can take on the draft fixes below with basic tools and an afternoon. Each has a how-to or a table earlier in this post, and none of them requires removing trim, cutting into a frame or touching paint in a house built before 1978.
- Door sweeps: surface-mounted or slide-in, on doors that close square.
- Threshold caps: a quarter turn at a time until the dollar bill drags.
- Kerf-in seals: when you can match the old profile.
- Sash locks and interior caulk: lock everything, then caulk trim gaps with paintable latex.
- Track cleaning: patio doors, sliders and storm window weep holes.
Jobs to hand to a pro
The jobs below take specialty tools, experience or both, and a mistake can cost more than the repair. They also tend to reveal a second problem once the trim or sash comes off, such as rot behind a sill or a jamb that was never shimmed. Our door and entry repair crew handles all of them.
- Rehanging or planing a door: especially heavy, glass or fire-rated doors.
- Sash balances and sash cords: on double-hung and old weight-and-pulley windows.
- Rotted sills and jambs: cutting out rot and patching or replacing wood.
- Sealing behind trim: pulling and reinstalling casing without cracking plaster.
- Painted surfaces in pre-1978 homes: work that falls under federal lead-safe rules.
Why a licensed builder shows up for small jobs
Most homeowners assume the choice is a handyman or nothing, because remodelers do not call back about a sticking door. Wright’s Repairs exists for exactly that gap. The same company that builds kitchens and additions sends W-2 employees, not subcontractors, to fix a drafty door or a rotted sill. They are licensed, insured and backed by a written warranty. The home repair packages we offer bundle common fall jobs so one visit handles several.
We are clear about what we do not do. Insulation, roofing, gutters and heating and cooling systems are outside our repair scope, and when we find a problem in one of those areas, we tell you and point you to the right trade. That keeps our crews focused on carpentry, doors, windows, trim, drywall and paint, which is the work behind nearly every drafty opening we find.
What a Wright’s draft sealing visit looks like
A visit starts with a walk-through. We go room by room with you, looking at every exterior door and window, the attic hatch, the garage entry and anything else that feels cold. We test seals, check reveals and hinges, look at sills and caulk lines and note anything that needs a second look. You get a plain list of what we found and what each fix involves. Nothing gets done without your OK.
Most weatherstripping, sweep, threshold and adjustment work gets done on the same visit. Custom parts, such as a matched seal profile, a replacement sash balance or a milled trim piece, may need a second trip. We clean up behind ourselves and leave the house the way we found it, minus the drafts. If you want to see how our bigger projects come together, our design-build process page explains how the same crews plan and build larger work.
What to have ready before your visit
A little prep makes the visit faster and the findings more useful, and it means we spend our time on the leaks instead of moving boxes. Here is what our technicians ask homeowners to have ready before a weatherstripping and draft visit.
- A list of the rooms that felt coldest last winter, worst first.
- Clear access to the attic hatch and every exterior opening.
- Furniture pulled a foot away from exterior walls where you feel drafts.
- Any paperwork on the age or brand of the units.
- Photos of water stains, frost or condensation you noticed last winter.
Pairing draft work with other fall repairs
Because a technician is already on site with tools, it makes sense to bundle small jobs. A smart thermostat installation helps you see what the sealing work does to your furnace run times. Swapping a tired entry set during a door visit, patching the drywall dings near the front door or refreshing a hallway with room repainting are all common add-ons.
Some households come to us at a turning point. A new homeowner repair package works through the list an inspector left behind. Sellers use pre-listing home repairs to fix drafty doors and soft sills before buyers notice them. Landlords book rental turnover repairs between tenants, and families preparing for an older parent often start with bathroom safety for seniors and doorway widening.
Door and window repair across Southeast Michigan
Our shop is at 7101 Platt Road in Ypsilanti, and Wright’s Repairs visits stay within about a 30-minute drive of it so our technicians spend their time on your doors rather than on the highway. Most of our draft sealing work happens close to home, with door and window repair in Ypsilanti and Pittsfield Township leading the list, and our trucks are in those neighborhoods every weekday.
A little farther out, our repair crews work in Ann Arbor homes, Superior Township, Scio Township and Saline. West of Ann Arbor, they head to Dexter and Chelsea, where farmhouses and newer subdivisions sit side by side, and south to Milan. To the east, we cover Canton, Belleville, Van Buren Township and the colonials of Plymouth and Northville.
Outside that drive, our design-build team still takes on larger door and window projects across Washtenaw, Wayne, Oakland, Livingston, Monroe and Macomb counties, from Livonia and Brighton to Farmington Hills and Monroe. If your house is beyond our repair zone, we will say so when you call and suggest the right next step. See the full list of towns we serve in Southeast Michigan.
Our hours and how to book
Our office is open Monday through Friday from 8 a.m. to 4 p.m. and closed on weekends. Call us at (734) 540-0347 or send a request through our site, and we will set up a time to look at your doors and windows. If a draft is letting water in or a door will not lock, tell us when you call so we can move it up the list.
Drafty door and window questions we hear most
Homeowners ask our technicians these questions more than any others during fall visits, and the short answers below should get you started. If yours is not here, book a home check and ask us in person, or call the office during business hours and a member of our team will walk you through it.
How do I know if my door needs new weatherstripping or a whole new door?
Start with the seal. If the weatherstrip is torn, flattened or painted, and the door itself is solid and square, new seals and a sweep usually fix the draft. If the slab is split, the frame is soft at the bottom or the door is warped so badly that no adjustment helps, it is time to talk about replacing an exterior door.
Can I caulk windows and doors in cold weather?
Interior caulk can go on any time of year. Exterior caulk needs a dry surface and a temperature above the minimum printed on the tube, which is often around 40 degrees. In Southeast Michigan, that usually means finishing exterior caulking by mid-October, then saving anything you missed for the first mild, dry week of spring. A temporary interior seal can carry you until then.
Is it worth repairing old wood windows instead of replacing them?
Often, yes. Original wood windows with sound frames can be tightened with new sash cords, balances and weatherstrip, and a storm window outside adds another layer. Restoration also keeps the look of an older home, which matters in historic districts. When the frame has rotted or racked, replacement makes more sense, and our window replacement guide for Michigan homeowners explains the options.
Does plastic window film stop drafts?
Interior shrink film kits can cut drafts and condensation on a window you do not open, and they are a reasonable stopgap for renters or for a window waiting on repair. They do not fix the leak itself, and they make the window awkward to open until spring, so skip them on any bedroom window that serves as an emergency exit.
Will sealing drafts lower my heating bill?
It usually helps, but we will not promise a number. Savings depend on your furnace, your thermostat habits, how tight the rest of the house is and how cold the season runs. What sealing does reliably is make rooms more comfortable, cut cold spots near doors and windows and protect wood from the water that follows air through a gap.
Do storm doors help in a Michigan winter?
On a shaded or north-facing entry, a well-fitted storm door cuts drafts and protects the main door from snow and ice. On a south or west entry that gets hours of direct sun, the glass can trap enough heat to damage the main door, so a retractable screen model or no storm door is the safer choice. Check your entry door warranty first.
Does Wright’s fix drafty doors and windows in my town?
Our repair crews work within about a 30-minute drive of our Ypsilanti shop, which covers Ypsilanti, Ann Arbor, Saline, Dexter, Chelsea, Canton, Plymouth, Northville, Belleville, Milan and the townships between them. Larger door and window projects reach all six counties we serve. Reach our team through the contact page and we will confirm on the first call.
Get your drafty doors and windows fixed before the deep cold
A drafty house is rarely one big problem. Usually it is a dozen small gaps, most of them at doors and windows, and most of them fixable in a single visit. Worn seals, sagging hinges, loose sash locks, dried-out glazing and caulk that let go years ago are all carpentry, and carpentry is what our crews do every day. The sooner you find them, the more of your winter you get to spend comfortable.
Need a hand? We are here for the small jobs as well as the big ones. Contact us today to book a draft sealing visit, or check out our Portfolio to see the kind of work our crews do across Southeast Michigan. Contracting done Wright starts with a door that closes right.